The Chromebook as per the Chromebook website is a new and a faster computer that starts in seconds and offers you with thousands of apps. It has a built-in virus protection module and backs up your stuff in the cloud. They are easy to use, have virus protection built-in, and they keep you going with a long-life battery so you can work for as long as you want to without any obstructions. They are designed to keep themselves up to date so you don’t have to update it manually every time they release a new update and have the latest virus protection along with latest features like voice search. The best part of having a Chromebook is that it doesn’t slow down over time so it won’t test your patience. It updates itself, for free, so you always have the latest & greatest version. There’s no need for manual downloads & upgrades. What’s more? No set up is required and you can just log in with your Google account. Load times are also not long, just flip it open & get busy doing anything other than waiting and getting your patience tested. It comes with a long-life battery so you can leave your charger at home without the fear of finding yourself in a situation where you need a charger badly. Another great feature of Chromebooks is that they stay synced with your Android phones and tablets and everywhere else where you’re signed in with your Google account, so your stuff will always stay with you, even when your laptop doesn’t. Let’s now begin with how to take a screenshot on a Chromebook.
So you must be knowing how to take a screenshot in Windows or MacOS, but if you are new to Chromebooks, you might be unsure as to how to do it on a Chromebook. The process is not drastically different from the previously stated two devices, but it is far from the same. While even the best of the best Chromebooks don’t include a “Print screen” key or “PrtSc SysRq” key in some other devices, learning how to take a screenshot on a Chromebook is fairly simple — whether you need to grab the entire screen or just a portion.
Quick tips on how to take a screenshot on a Chromebook :
- Hold down the following keys > Ctrl + “Switch window” to capture a full screenshot.
- Hold down the following keys > Ctrl + Shift + “Switch window” to capture a partial screenshot.
CAPTURE A FULL SCREENSHOT
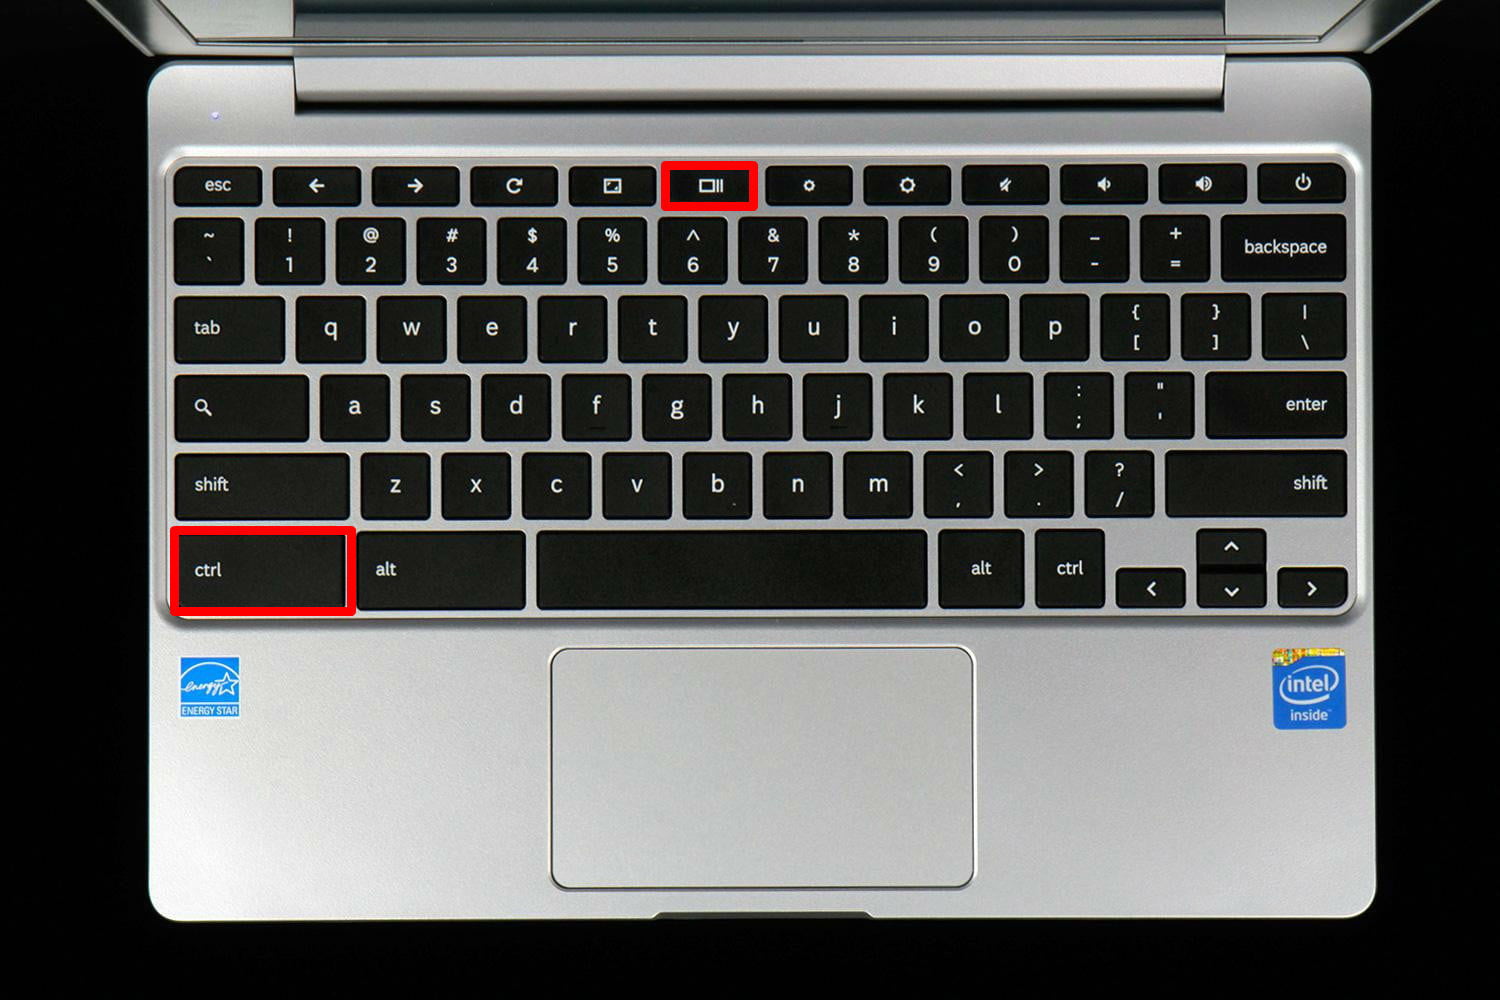
To take a screenshot of whatever you see on the screen of your Chromebook at once, hold down the “Ctrl” key & press the “Switch window” key. The latterly mentioned button is located in the top row, in between the following keys “Full-screen” and “Brightness down” & is represented by multiple squares.
Once you press them both, you will be able to see a notification in the bottom hand corner of the screen alerting you that the screenshot you wanted to take has been saved. Screenshot image files get saved directly to the “Downloads” folder of the Chromebook, so you can take & access screenshots even when offline & are labeled with the date & time they were recorded. Then you need to click the notification to open the Downloads folder & select the image file.
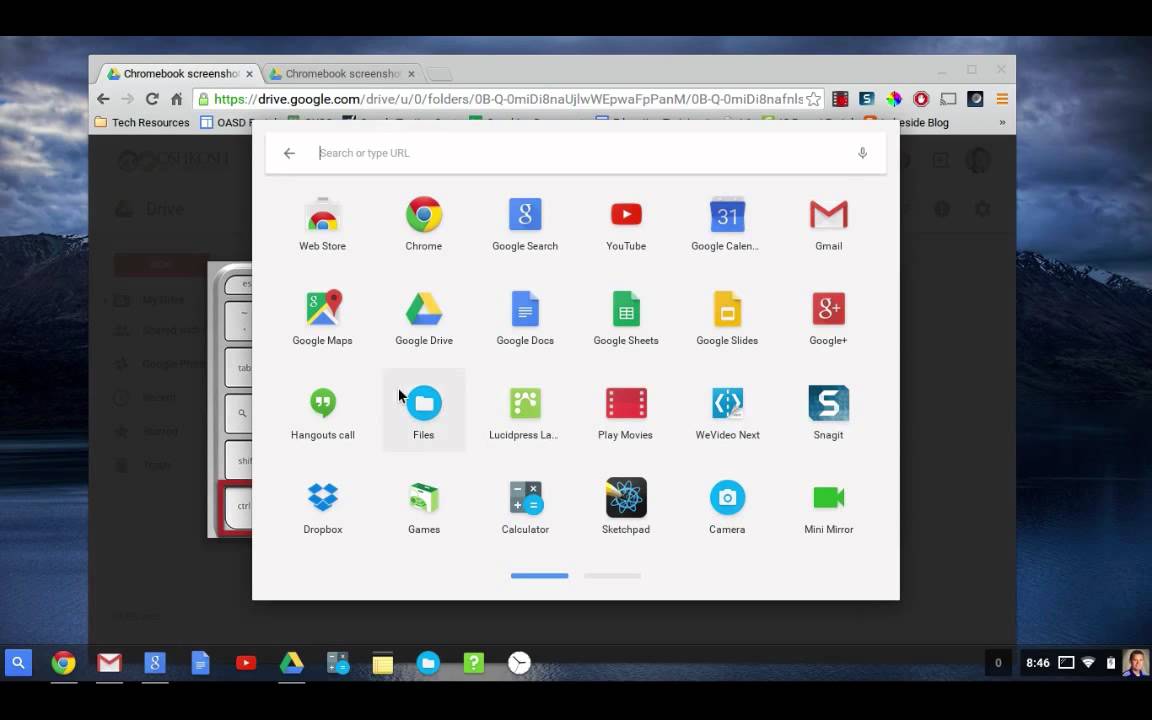
Note: Screenshots are saved locally & won’t be available on Google Drive unless you make it available manually by moving the file.
If you have a Chromebook with a 360° hinge like that found in a Pixelbook, there’s one more method you can use for capturing a full screenshot. As long as you are running Chrome OS version 64.0.3282.134 or later, you can just press the power button & volume down buttons at the same time just as you would on an Android smartphone. This is great when you are using the tablet mode where using the keyboard is far from convenient.
CAPTURE A PARTIAL SCREENSHOT

Chrome OS can also specify a portion of your screen to save a screenshot of. Here’s how you can do it.
Step 1: Hold down the “Ctrl” & “Shift” keys together and then press the “switch window” button.
Step 2: Chrome’s cursor will temporarily get replaced with a crosshair. Click & drag a square across the portion of the screen you want to save and then release the trackpad or mouse button.
In this way, the partial screenshot will get saved in the Downloads folder in the same way as that of a full screenshot.
Also Read: How To Download Showbox On Firestick Without Any Hassle